Account of editing
Once all the filming had been completed,
it was time to upload the footage to the computers for the post-production
processes such as editing to begin.
 Once the camera had been connected, we had the
tedious task of rewinding all of the footage back to the start as the school
computers use Adobe Premiere Pro CC which uses a real-time capture feature to
allow us to grab footage from the tapes. Once the tape had been rewound to the
beginning, we pressed the 'Capture' button to begin the footage grabbing to
allow them to be stored on the digital memory of the computer to allow us to
store it in Premiere's "media bin", allowing us to use the footage
whenever we wanted.
  Initially, we had a problem when trying
to capture the footage as it was not allowing us to record from the tape,
however, after a quick bit of searching with another member of the group, we
managed to deduce that the problem was that the import settings were not the
same as the settings of the actual camera, thus it was unable to read the
footage properly. The capturing of the footage took a while as the real-time
processing meant that, as we had about an hour's worth of footage, we had to
wait around an hour for all the footage to import. This seemed to be a large
issue as this would use up all the time we had during our media lesson, which
meant that no editing would be done, however, two members of our group, one of
which was me, realised that we had an hour long free period after lunch, as
well as the hour long lunch break which we could use to edit.
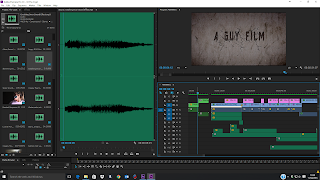
The first thing we did was to place the
entire clip of an hours worth of footage onto the timeline on Premiere. We then
sifted quickly through the footage by dragging the timeline indicator across
the footage. This was because we knew we had large amounts of wasted footage
and dead air between shots and didn't need to hear any of it or watch it
properly. We had to use the "Razor" tool (hotkeyed at 'c') to cut the
clips at the start and end, then switch back to the selection tool (hotkeyed at
'v'). We clicked on the clip that had now been separated as it was no longer
needed and deleted it. This process was repeated multiple times until all the
unnecessary footage and dead air was gone from the imported footage.
Once all of the dead footage was gone,
we then cut up the useful footage into 'bitesize' chunks so that they'd be
easier to edit and saved them to the media bin by creating 'subclips' of them.
This then made it so that each of the clips could be used at any point in the
editing process regardless of whether or not they were on the timeline and
could be placed wherever we wanted the clip to be. This entire process took the
entirety of lunch, and our two other group members had to leave for their
lesson so handed us the storyboard as a guideline.
 We sat down with the storyboard and
began to place all the clips in order. We loosely arranged all of the clips
apart from those of the title sequence as we decided that we'd do the title
sequence last, and then do all of the special effects.
Whilst this was going on over the course
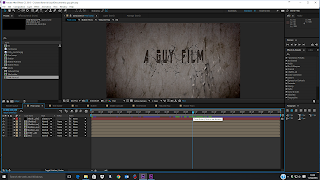
of a few weeks, I was working behind the scenes on my laptop using Adobe After
Effects CC to create the titles for the title sequence of our thriller. The two
"film companies" that our group had made up as the two companies that
are aiding in the production and distribution of our thriller were A guy Film,
and Romb media .
 Having finished all of the video and
audio arrangement, we then began to colour correct the video clips using
Premiere's Fast Colour Corrector and RGB Curves so that they looked better and
more cinematic. Once this was done, we then spent the next few days fine tuning
the video and audio clips and making sure everything looked as good as
possible, adding background ambience and a creepy copyright free songs in the
background.

Comments
Post a Comment