Prelim Analysis
1) Setting up the tripod
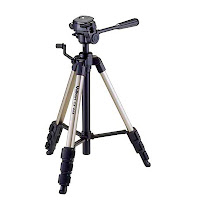
 Firstly choose the height of the tripod this will determine the height at which the camera is placed which depends the sequence in what is filmed and what will eventually be
2) Bubbling
The bubbling is very important in filming a prelim as it is helps balance the camera and so the shot can be what yout want it too fulfill. the set the right balance you need to loosen the cog of the tripod and place the bubble in the mid section of the of the circle, afterwards tighten the cog and the camera will be balanced
3) Put the camera on tripod
On the tripod there are 2 seperate buttons when placing the camera on the tripod press the 2 buttons seperately and the with one hand on the camera and one and one the buttons place the camera on the tripod. Let go of the buttons and the camera will be firmly attached
4) Battery
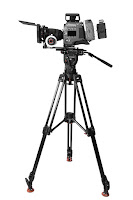
 Myself, Rachel , cesar and yosi all chose to film the sequence in the gym with the camera on the tripod that we set up (look above) earlier. We chose cesar and yosi to act and myself and Rachel to film we used the 180 degree rule as the 2 boys were having a conversation to be successful in this we had to do different types of shots these included:
 When we started editing we had many different shots I think 18 all together and we had to decide as a group which ones to keep and cut out. We used a variety of clips and put them in order for the prelim to make sense. We also made the editing very precise to make sure it didn't look like the scene was edited which was difficult
 Firstly choose the height of the tripod this will determine the height at which the camera is placed which depends the sequence in what is filmed and what will eventually be
 2) Bubbling
The bubbling is very important in filming a prelim as it is helps balance the camera and so the shot can be what yout want it too fulfill. the set the right balance you need to loosen the cog of the tripod and place the bubble in the mid section of the of the circle, afterwards tighten the cog and the camera will be balanced
3) Put the camera on tripod
On the tripod there are 2 seperate buttons when placing the camera on the tripod press the 2 buttons seperately and the with one hand on the camera and one and one the buttons place the camera on the tripod. Let go of the buttons and the camera will be firmly attached
4) Battery
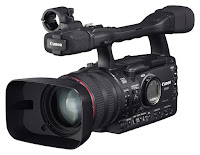
You cannot use the camera without the camera attached therefore you will need to place it in to the battery compartment. Slide the battery in with the arrow pointing down until you hear a click and then push the compartment shut
5) Power On
Switch the power button from OFF to ON
6) White Balance
Wherever you are located zoom into something white if there is no white bring a piece of white paper with the second wheel on the camera from your point of view. After that focus the white object with the third wheel then press the white balance button on the left hand side of the camera (WHTBAL)
7) Exposure (brightness)
You can set the exposure with the first wheel on the camera from your point of view. You can also alter the exposure with the settings at the side of the camera. These setting control the light balance, brightness and also the filters of your shots these can all be altered whilst filming
8) Focus
Before filming you will need to again zoom into the object you are filming or scene and wait for it to focus. After this you can shoot your video sequence
 Myself, Rachel , cesar and yosi all chose to film the sequence in the gym with the camera on the tripod that we set up (look above) earlier. We chose cesar and yosi to act and myself and Rachel to film we used the 180 degree rule as the 2 boys were having a conversation to be successful in this we had to do different types of shots these included:
-wide shot
- medium close up
- close up
- extreme close up
- over the shoulder shot
- long shot
We used a range of different shots to make sure we had the right footage to make a good prelim we filmed ever shot 3 times also for precision
I felt that we worked very well as a group as in the time given we were able to film every shot 3 times and still have time to edit this showed our organisation and determination. The 2 boys acting worked very well by allowing us to film them several times. The idea we all shared and turned out to be very clever and different. There were no arguments within our group and we set out what we planned to do
There were times we had to improvise within the task where we had to quickly think of an idea for the prelim, also the 2 boys had just been given the storyboard and therefore couldn't learn it off by heart so had to improvise whilst acting. Whilst I was filming them the camera went out of focus therefore I improvised by focusing the lense and making sure I didn't affect the acting going on
 When we started editing we had many different shots I think 18 all together and we had to decide as a group which ones to keep and cut out. We used a variety of clips and put them in order for the prelim to make sense. We also made the editing very precise to make sure it didn't look like the scene was edited which was difficult
Personally i found the editing tough due to it being my first attempt in editing a sequence. I found it hard to pick the best shots that fit the prelim well and it was difficult to make it look like the scene hadn't been edited. Although it was hard we still made a very good attempt of a prelim
When I was filming I learnt a lot of about the filming and editing industry. Firstly I found out that it is very hard and long work to do and we only filmed a 20 second prelim so it must be extremely hard for a 2 hour film. Although l enjoyed learning about all the different shots and the 180 degree rule and looking at that in detail in different films
If I were to film again I'd change the location we filmed at as it was difficult to really film the over the shoulder shots due to equipment which could of affected the way the conversation looked.
Comments
Post a Comment